
So unlike some of the far more organised individuals that I game with whose terrain is carefully stored in boxes designed for each part, carefully protecting the individual parts (very jealous) my current terrain setup is a single tub (disappointingly not even a Really Useful Box) of chaos that includes parts in every state of build / prime / paint and even a few finished bits!
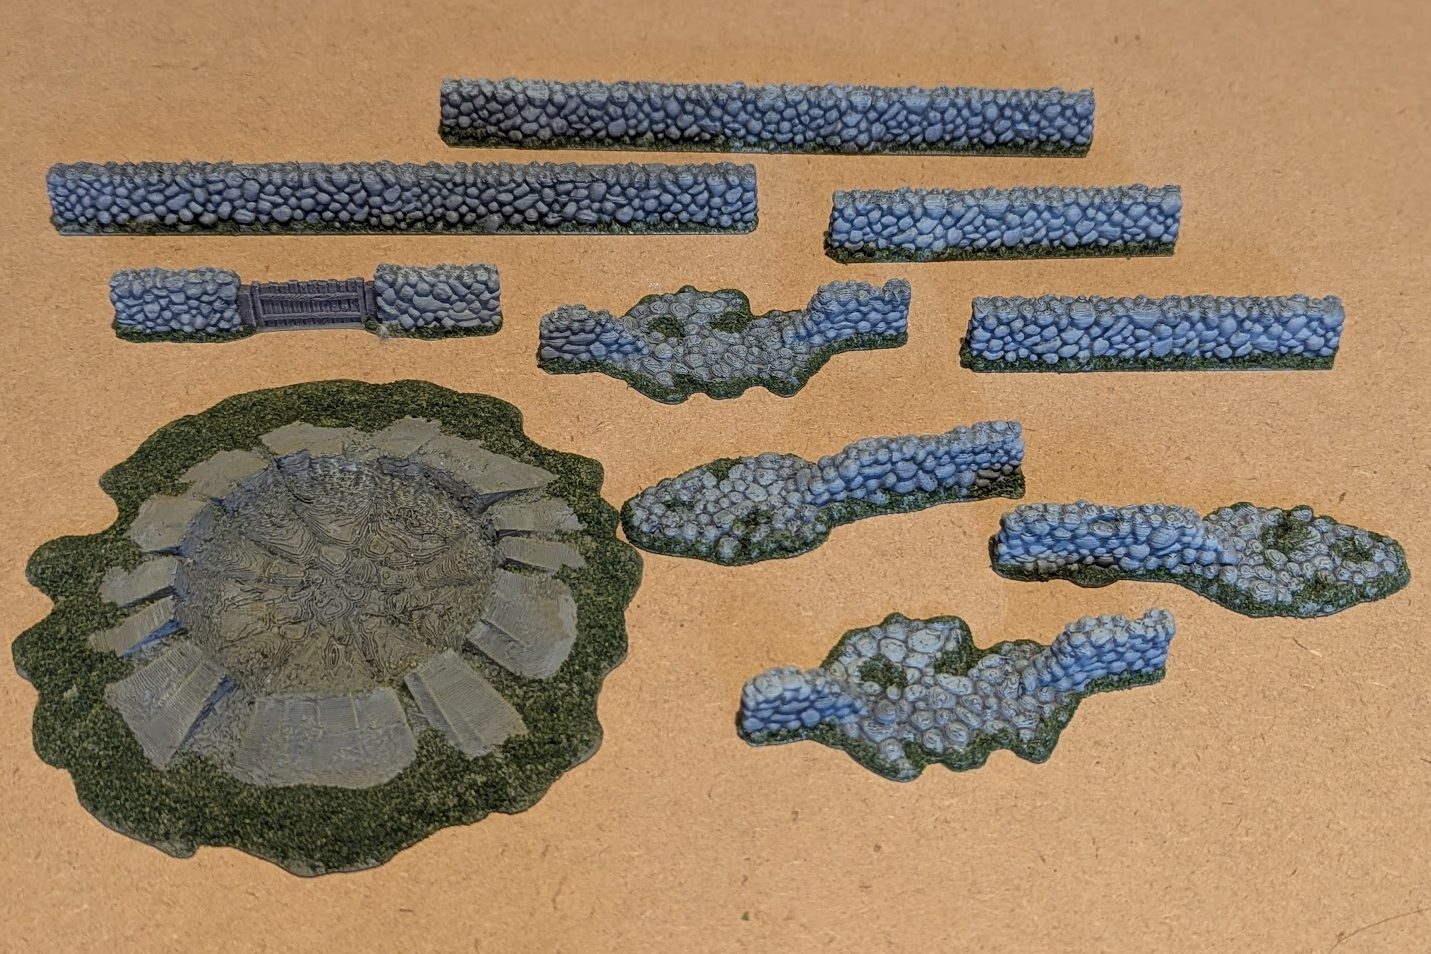
Another early FDM print that has only just recently come to completion are some general coble style walls and a blast crater, I’ve kept them free from having muskets leant against them or fallen guardsmen in the crater in the hope this will make them generic enough to serve for D&D, 40k, WW2 and any other wall building / explosive wielding setting. A explosive murder mystery in a quiet town square maybe!
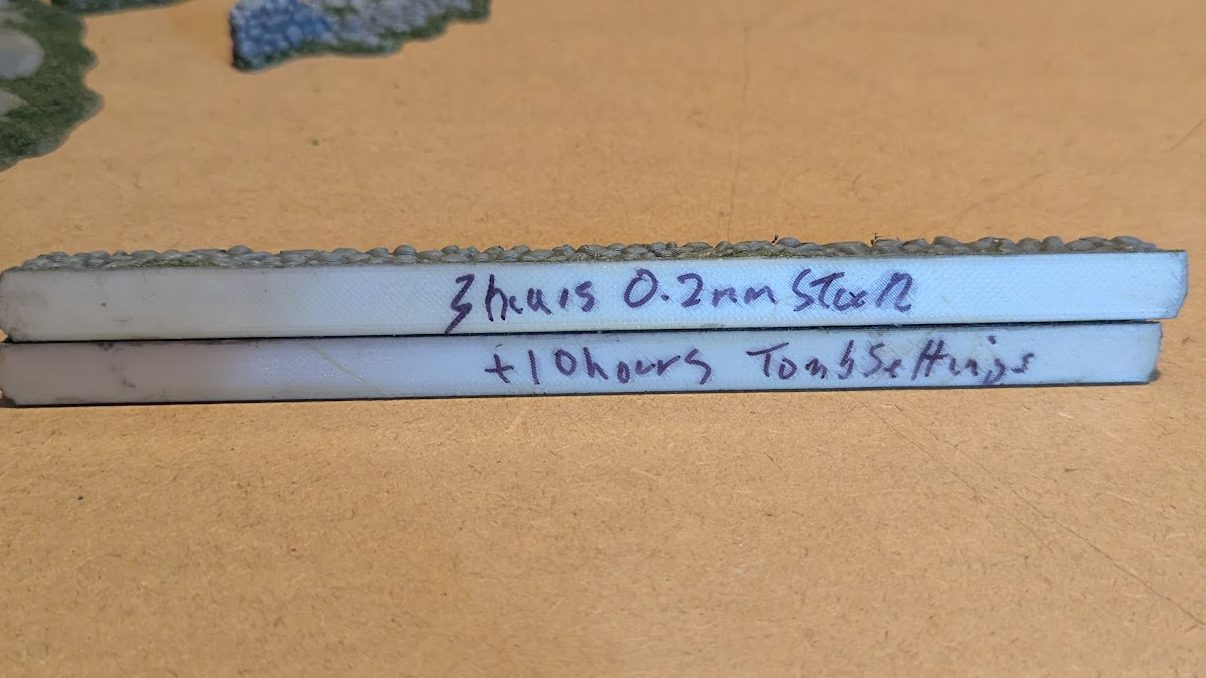
When I was printing the cobble walls (which I’ve since seen for sale at Salute!) I tried several print profiles resulting in wildly different print times / filament consumption that resulted in very little visual difference once primed at this scale! The ‘Tombsettings’ here refers to Fat Dragon Games profiles for my Creality Ender 3 V2 printer as well as many others for broth terrain and fine detail miniatures.
Next something more akin to old-hammer style terrain a basic imperial landing pad is hard to top from what I’ve seen in old GW promo shots, expect maybe the bright green ball with purple toothpick spike fauna. This was my first foray into hazard stripes, and on this scale keeping them straight was challenging.
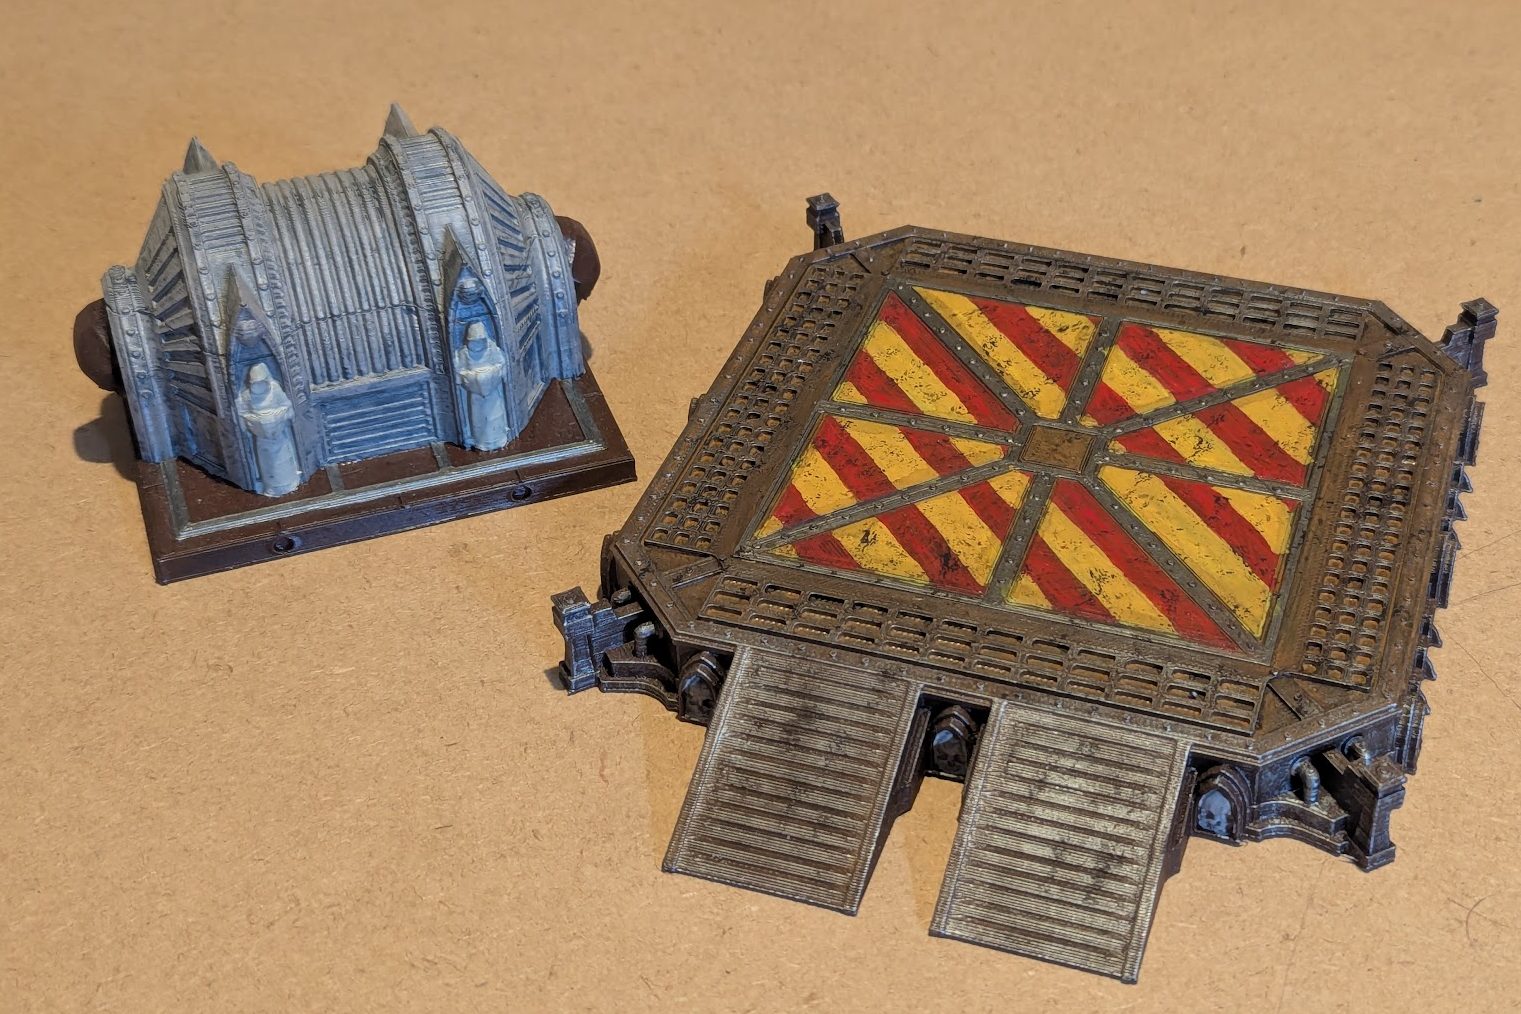
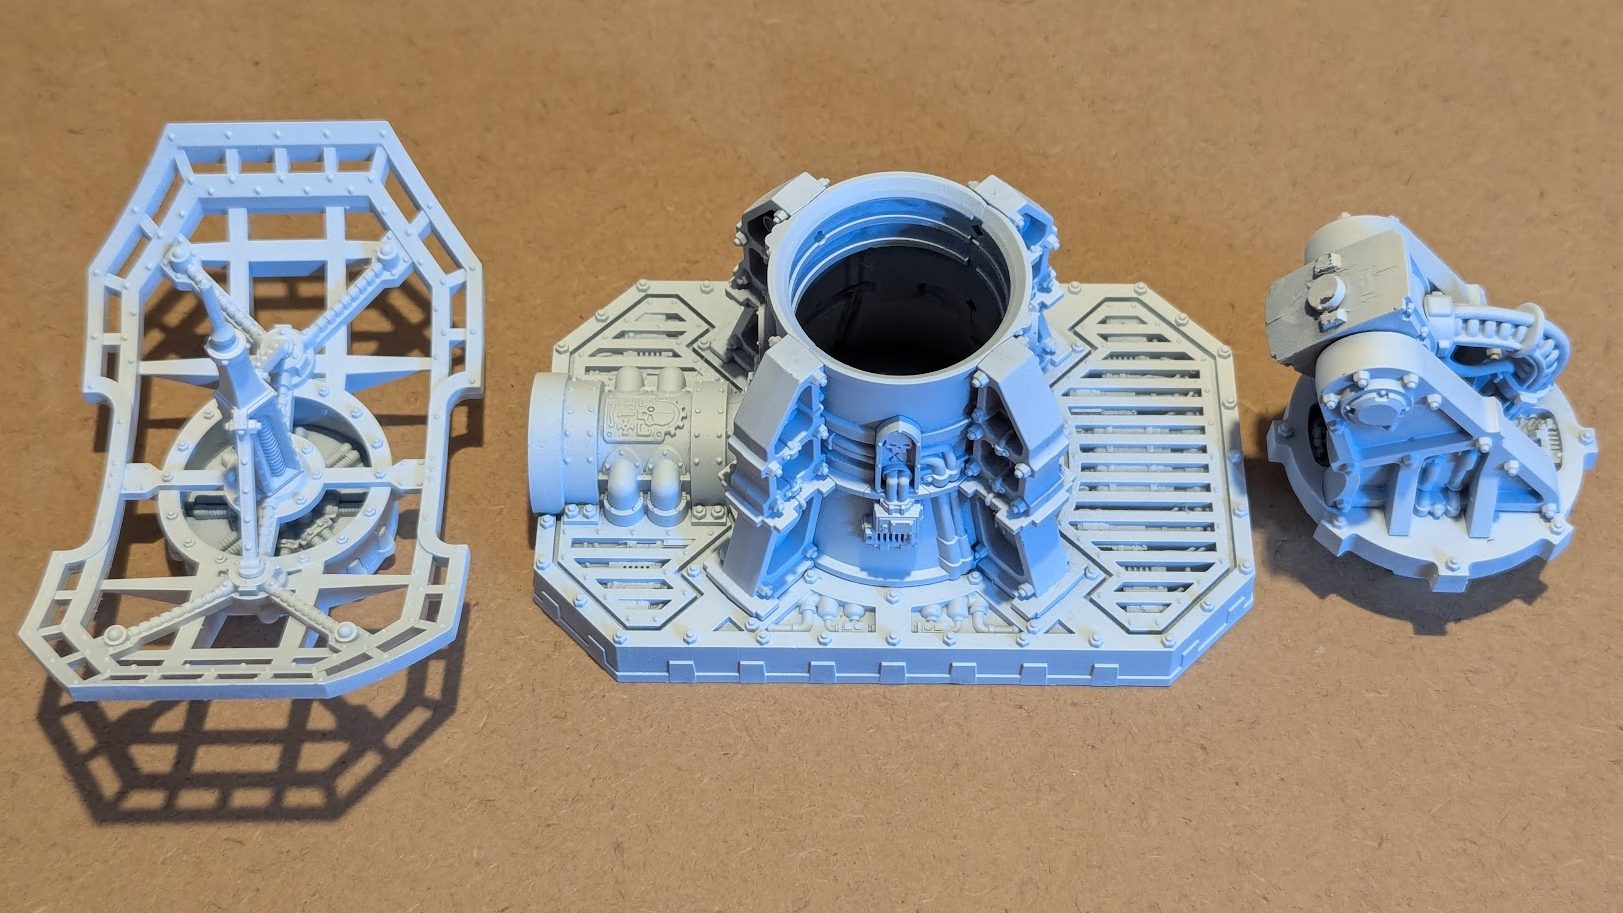
The quality of the print on the generator was not great and that has meant that when I applied the wash it added a load of horizontal lines including exposing a oops I knocked the machine layer shift just above the statues.
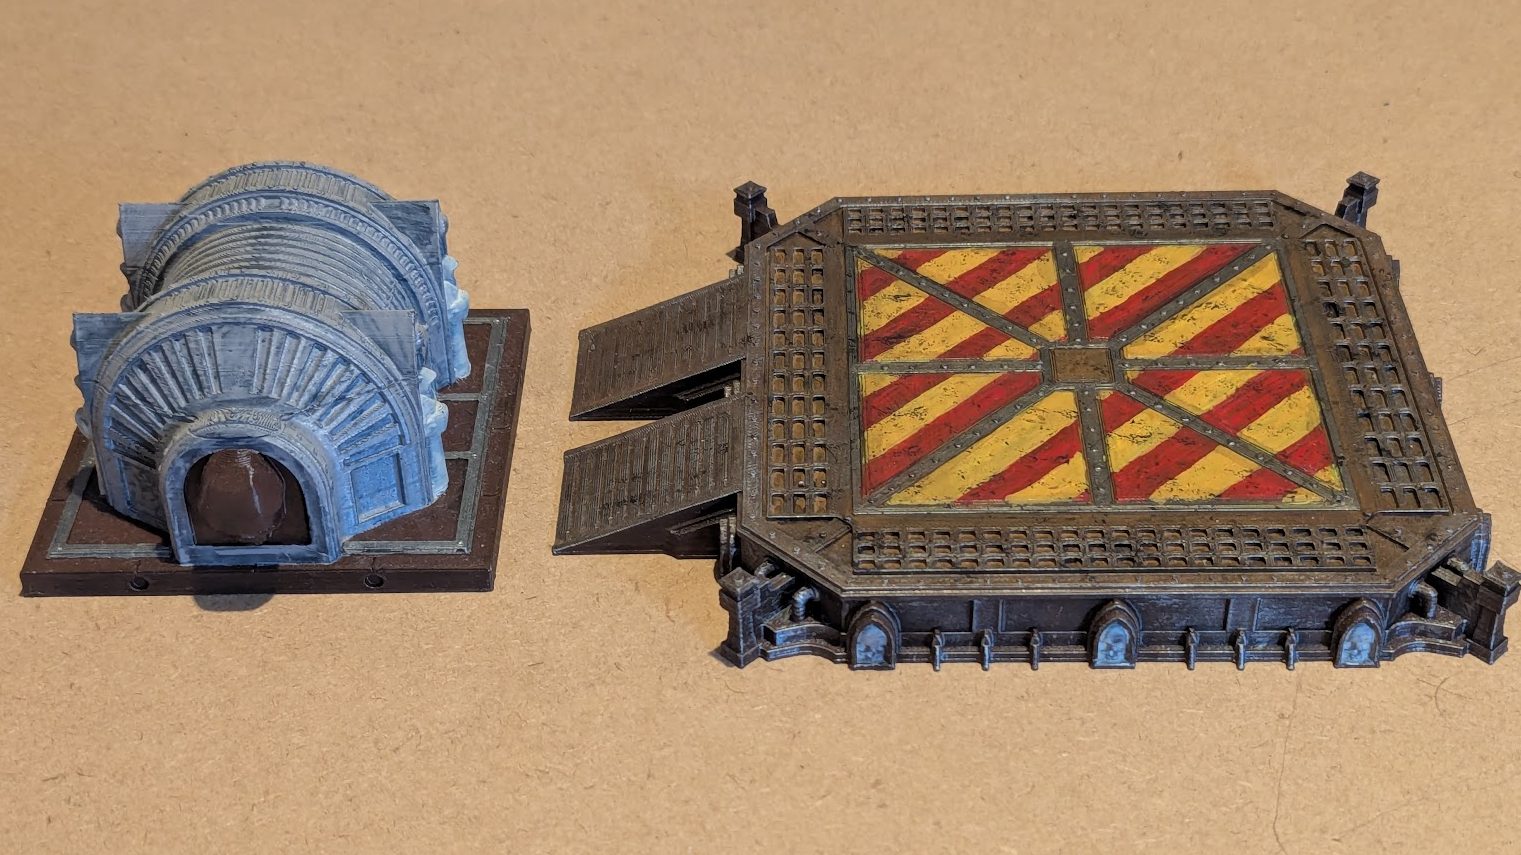
Although the Pad is as finished as I need to be for tabletop use the generator could still do with some work to not look just blocked in as the liquid talent didn’t quite work as well for me here as id hoped!
I’ve printed a two containers that are very similar to the Games workshop imperial ones as well as a tank based design they should make for good hiding terrain for small groups of units on their own, or as a stack for larger groups / units. I’ve only managed to complete one to fully painted so far, the other has had an horrendous base layer of cheap red paint and the others are just at a printed state.
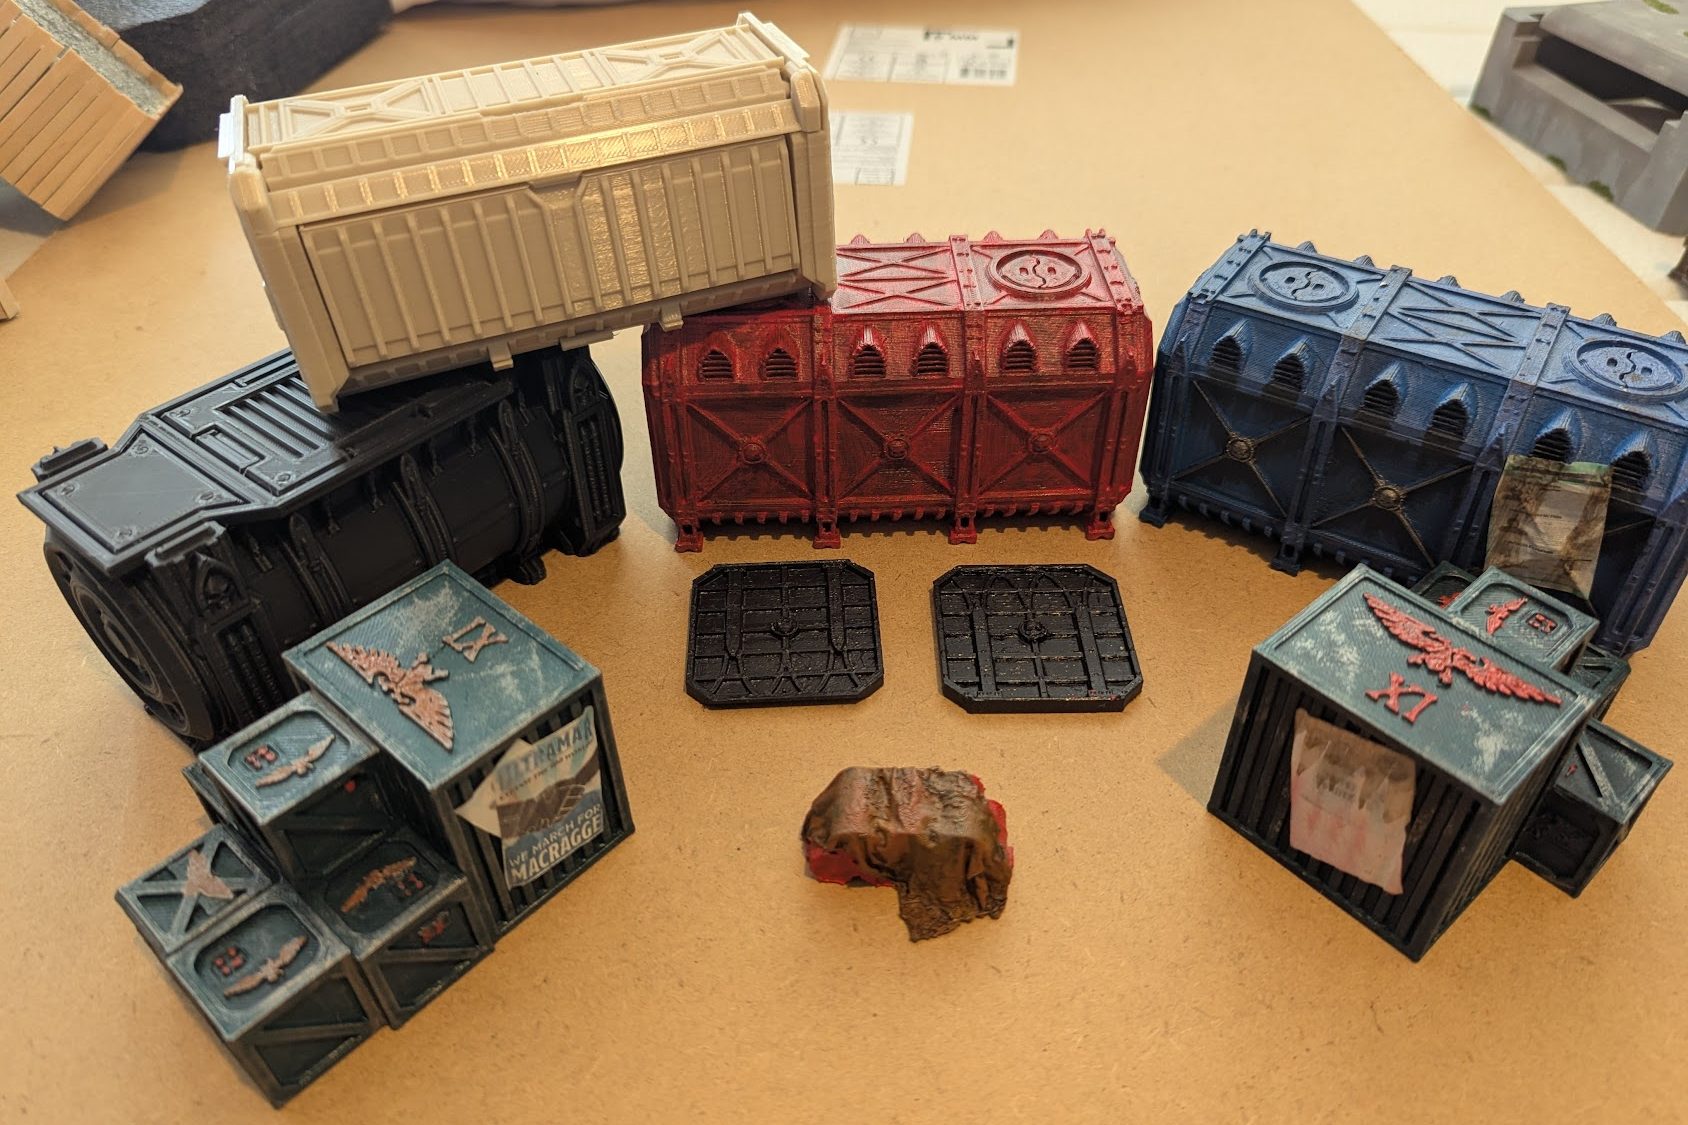
The top layer container actually holds a fold out secret which I will cover in a future post once’s it completely together / functional! I tried to apply some propaganda flyers to the outside of the containers to varying success, they are also appear on on some more general crates shown in front for scatter terrain.
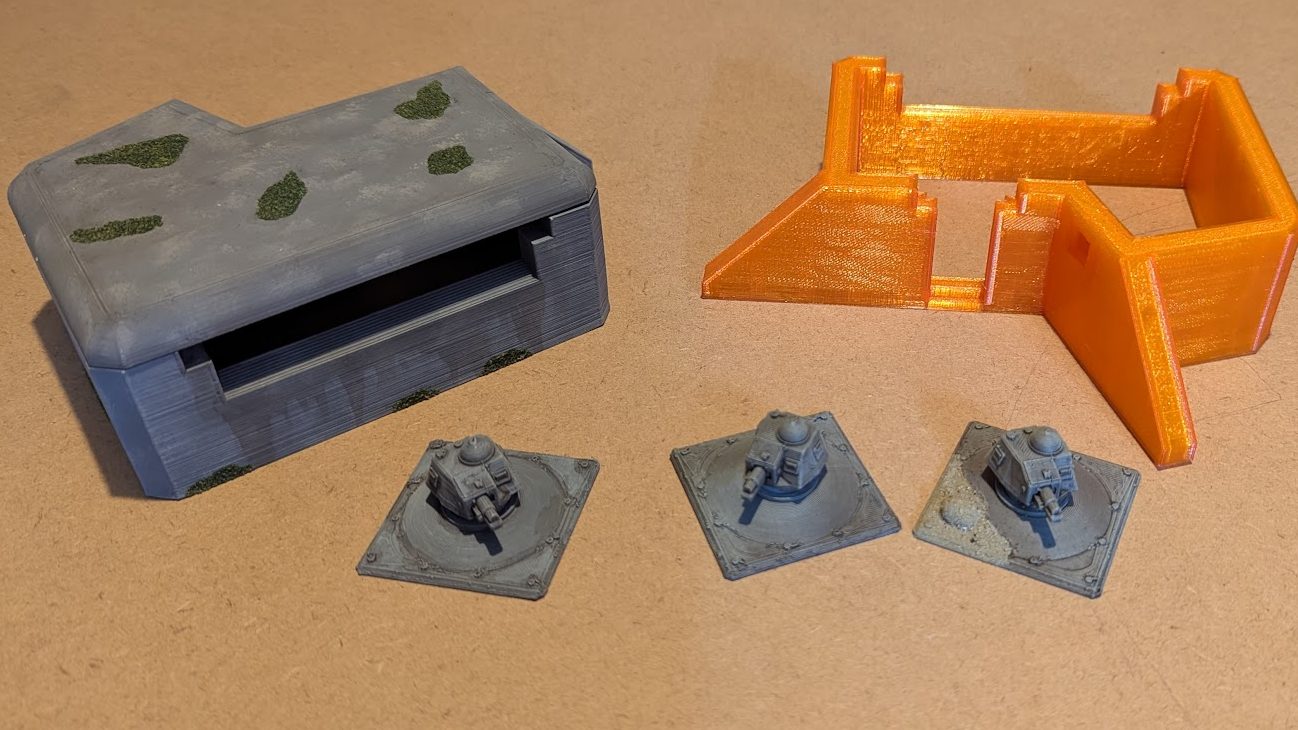
At some point in the very distant future when I can carve out some free time amongst work, toddlers, babies and partners there is a hope to play some bolt action (or similar) amongst a work group. As part of this I had grand plans of either a D-Day style board or a trench assault, the first of these requires a number of hard points and defences to build a German line of which I have completed some Turbruk gun emplacements and a bunker, the second striking the raw orange print will most likely attract some grey and dirt before hitting a real table!
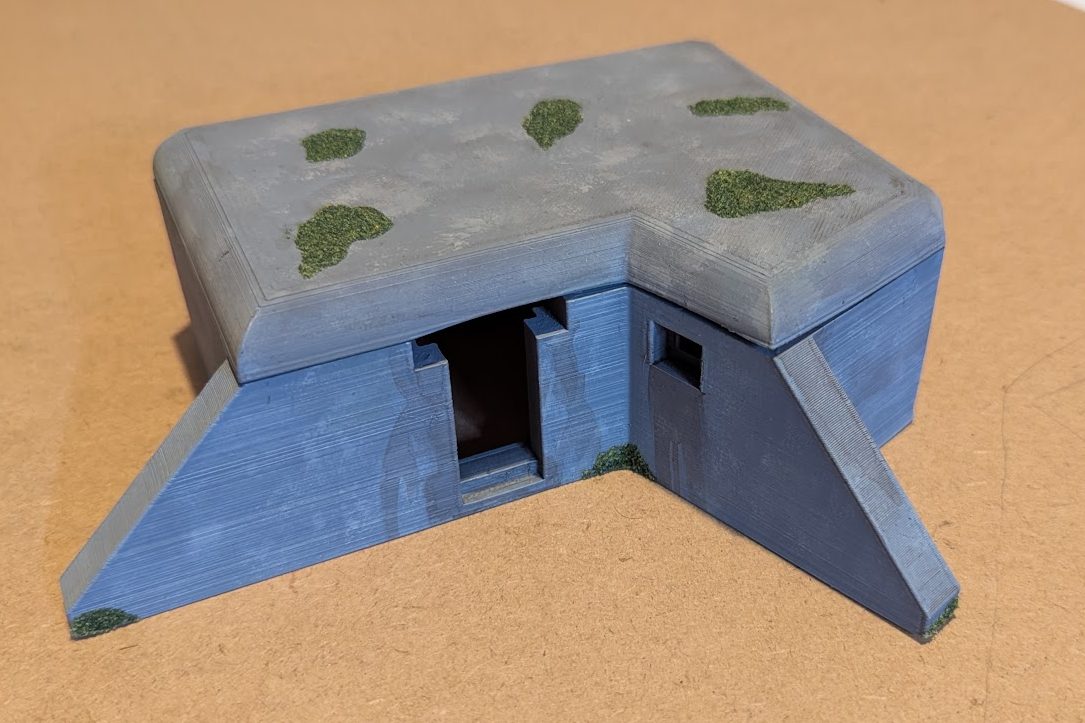
Here the FDM layer lines work I think to my advantage giving the layered look of the concreate structure, I also added some flocking as well as a bit of sponging across the grey to break it up to take them away from that ‘just built’ look to something more used and in place for some time. Finally was a layer of streaks from openings around doors, gun ports and main opening to add some further weathering.
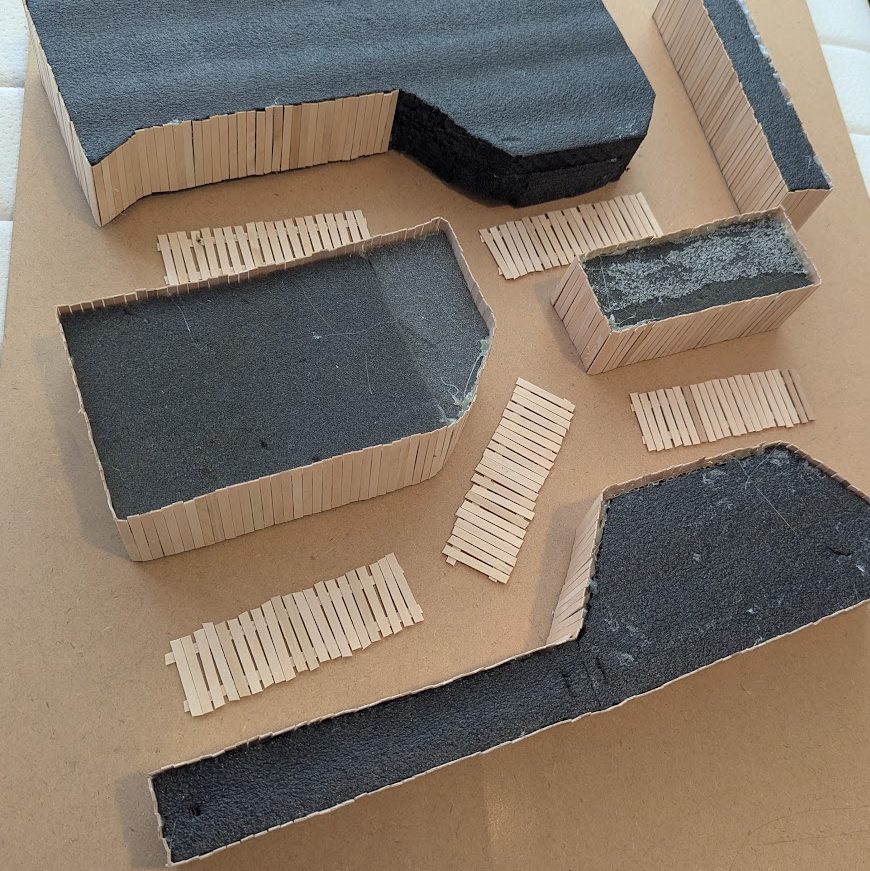
Yet more work in progress on display here, and more at the planning and playing end of the scale. What started as a fixed layout glued to the now reverse fluro green side of the below board evolved into something hopefully more useful and modular in the long run (not to mention more easy to store / transport, hopefully). They are built in bulk with various foam’s I had laying around from PC parts, kids toys packaging and even an old kayak seat, this means compared to prints they are very light.
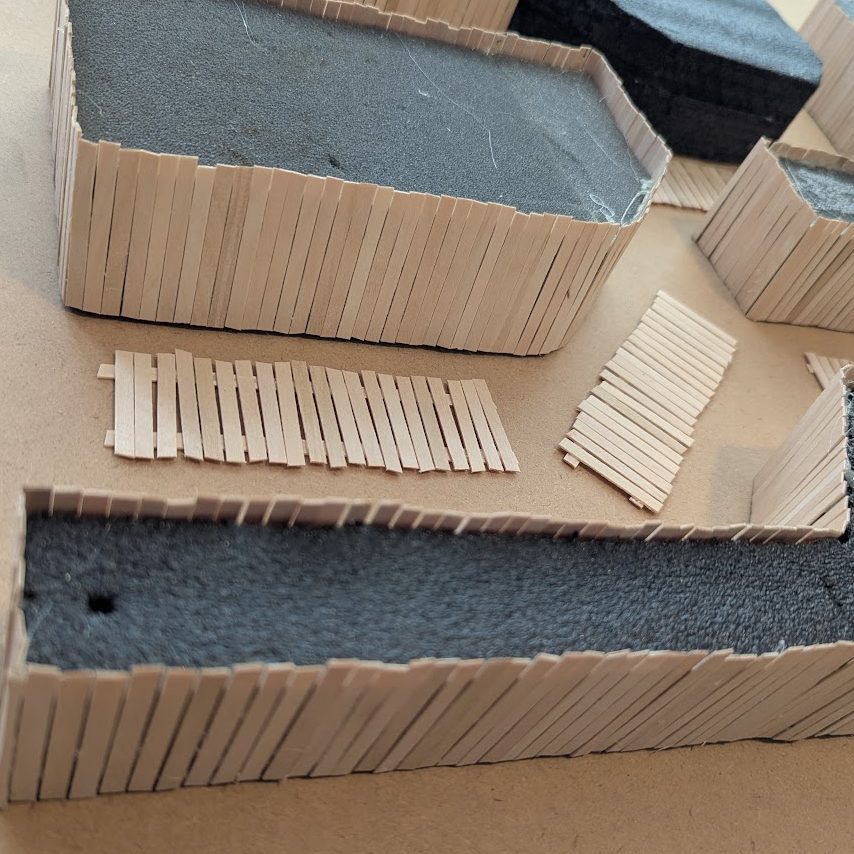
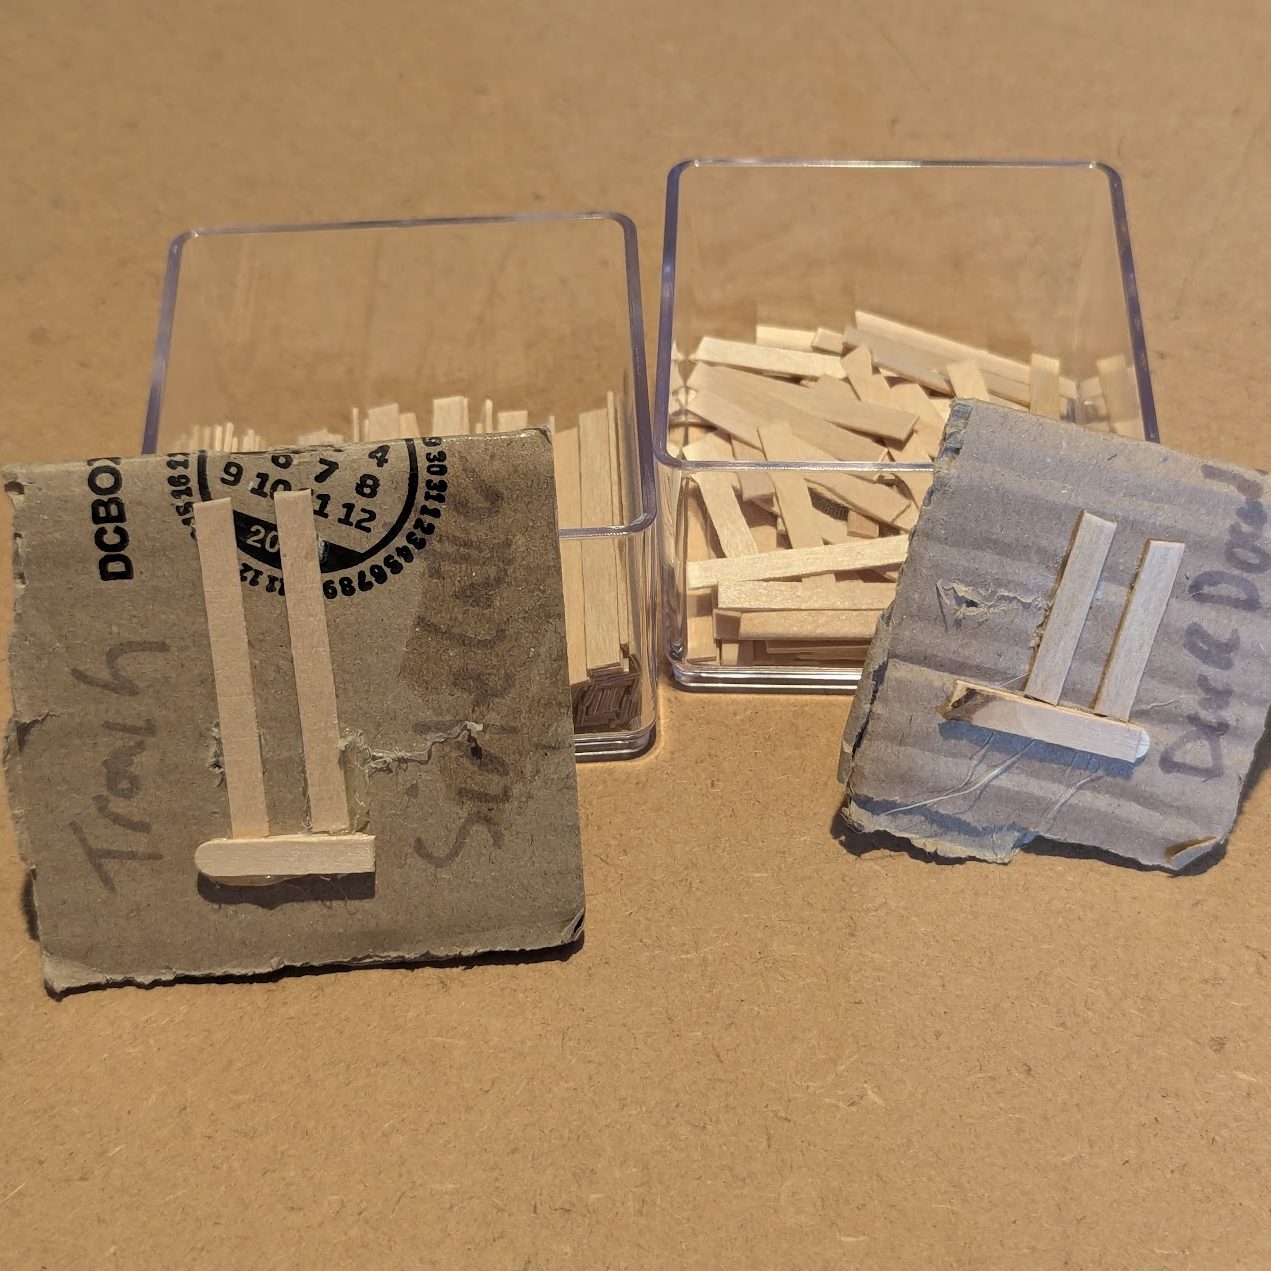
They have then picked up a cladding of coffee stirrers and hot glue cut to length with the above industry grade cutting jigs. The smaller of the two also allows for the cutting of slats to create trench style duck boards / bridges.
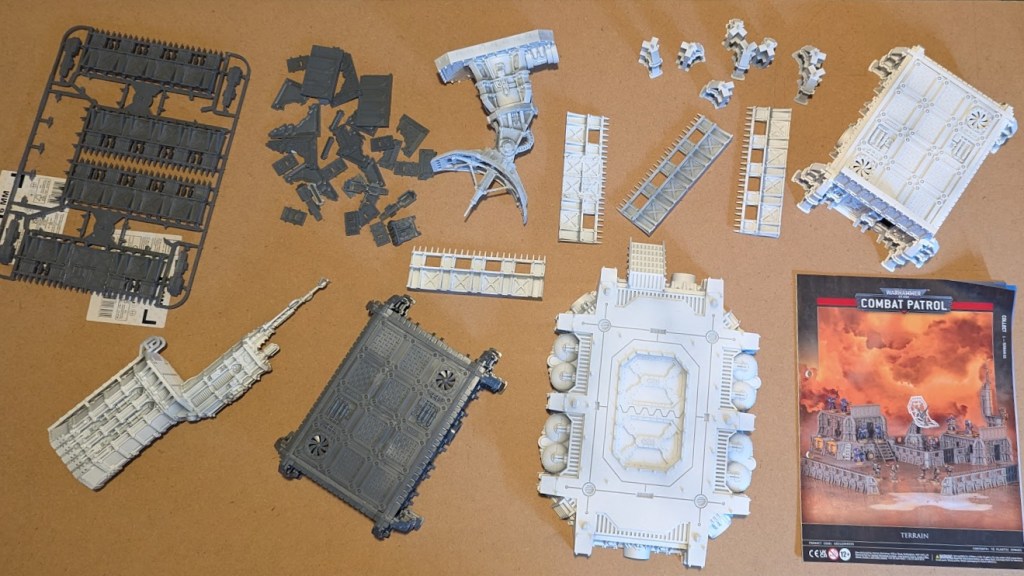
The Fronteris terrain pack was a subscriber special offer as part of the Hachette magazine run. Consisting of 8 sections of fence/wall, one landing platform, one Vox Antenna, one Auspex Shrine, and two Sector Fronteris hab-bunkers all in complete build state something arguably unusual compared t the grim dark ruins of most 40k settings.
All the terrain is now mostly clipped, cleaned (who ever designed the windows with 4 sprue attachments, I would like a word…) and primed in what turned out to to be the last of my rattle cans. The walls are modular and the buildings stack in a various well pinned ways to create larger multi story line of sight blockers.
The Vox Antenna came with instructions for a single orientation glued together, all be it the orientation in both rotation at the ‘waist’ and the vertical or horizontal position of the dish then changes through the remainder of the build and subsequent paint instructions. With this in mind and the ability to store it more easily I left the waist joint free floating and for the 2 options on the dish they are already keyed with a bar on one side to a cross on the other so the addition of a magnet ‘carefully hacked’ into the plastic in the centre allows for endless customisation.
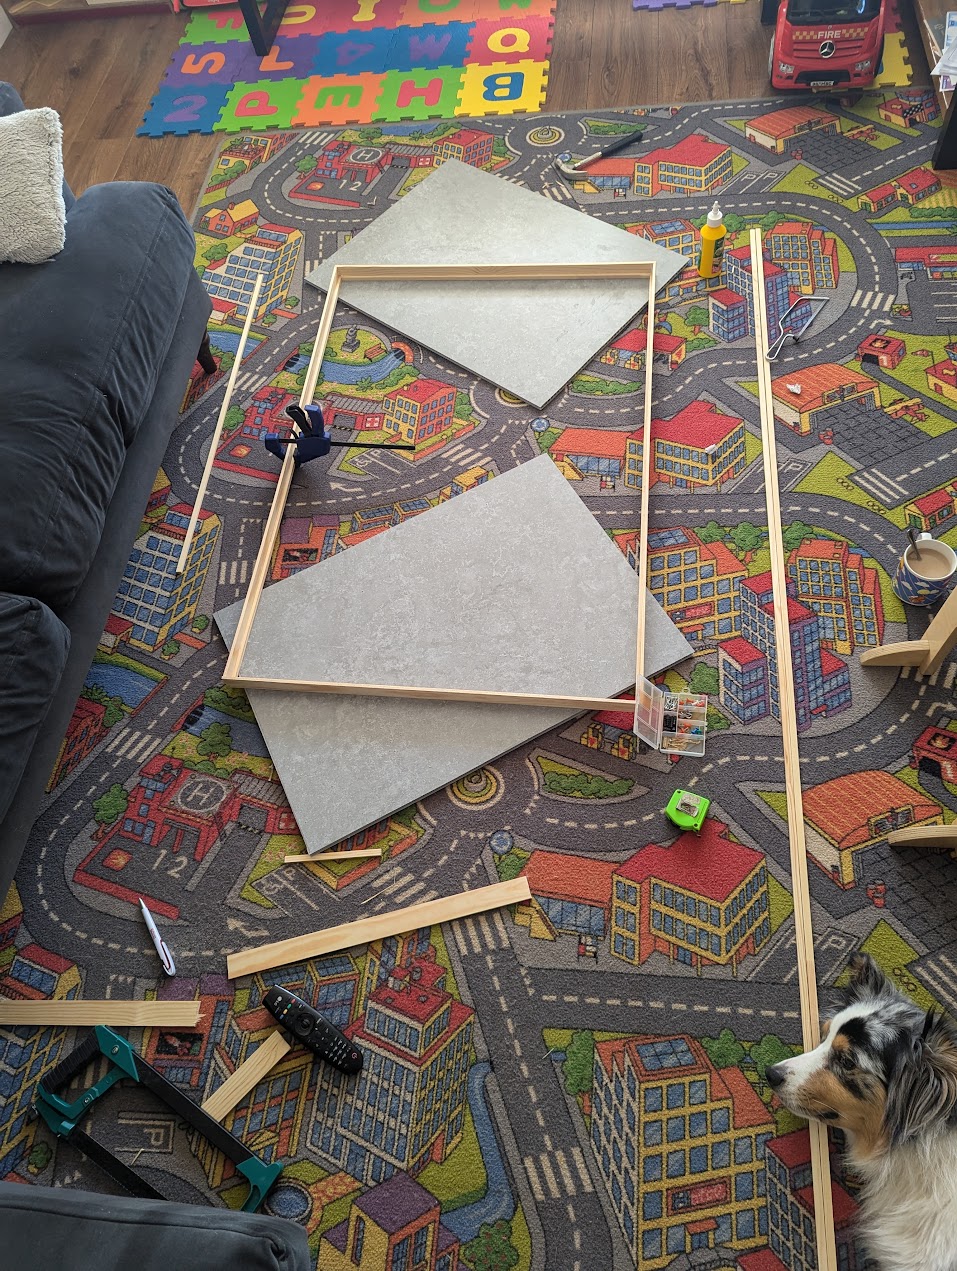
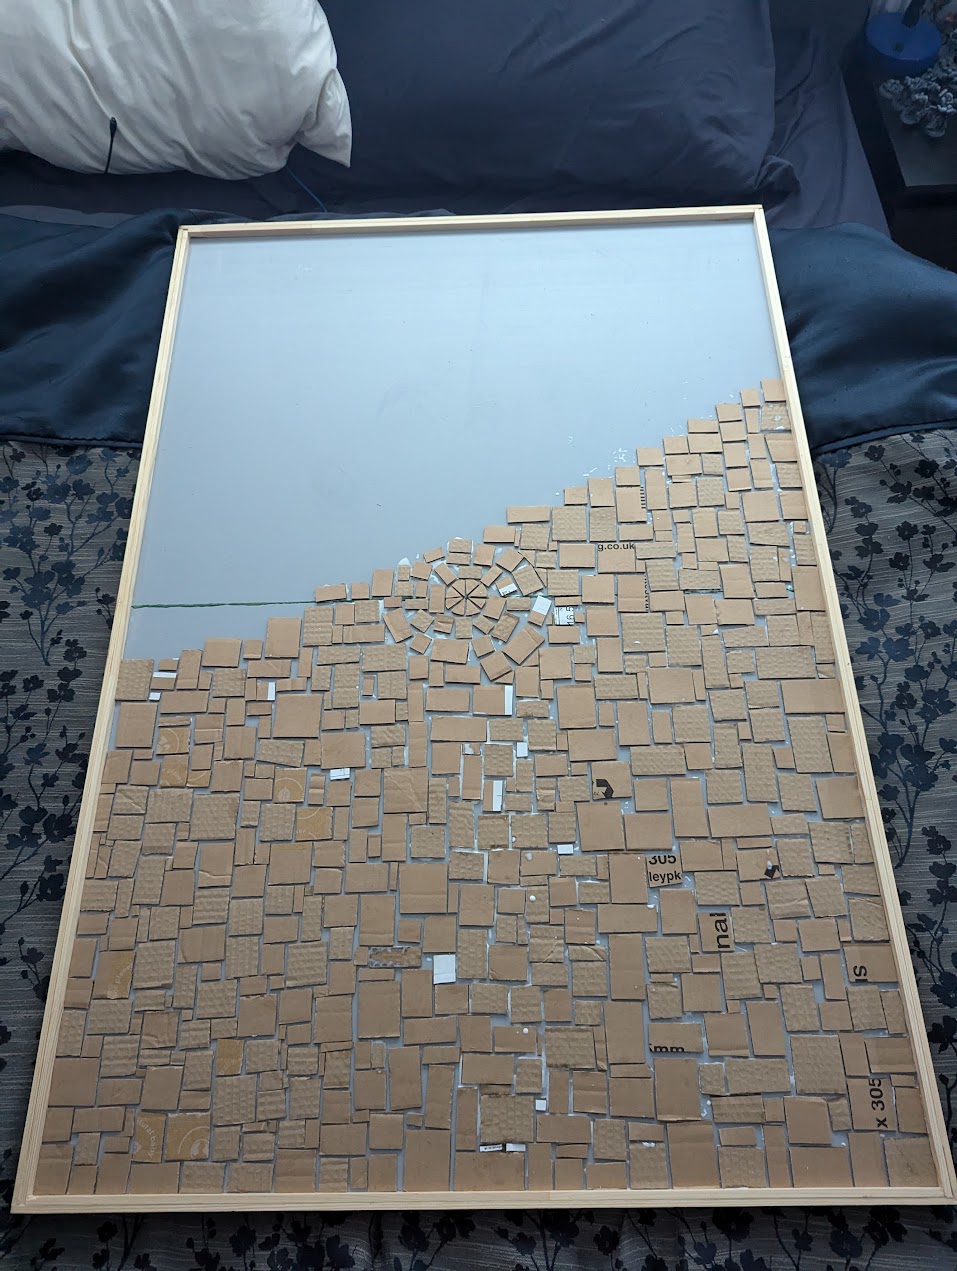
At the largest scale here and starting as a “have some spare materials from a bathroom rebuild” namely a sheet of light but strong wall panel, I built a frame around and green stuffed the joints smooth (ish). Once it was all together and after measuring time and time again to be the correct size for combat patrol board (44 inches by 30 inches) whilst cutting everything it was only then figured out that the batons to hold the edge in place take an additional 1/2 inch from the board leaving it slightly to small…
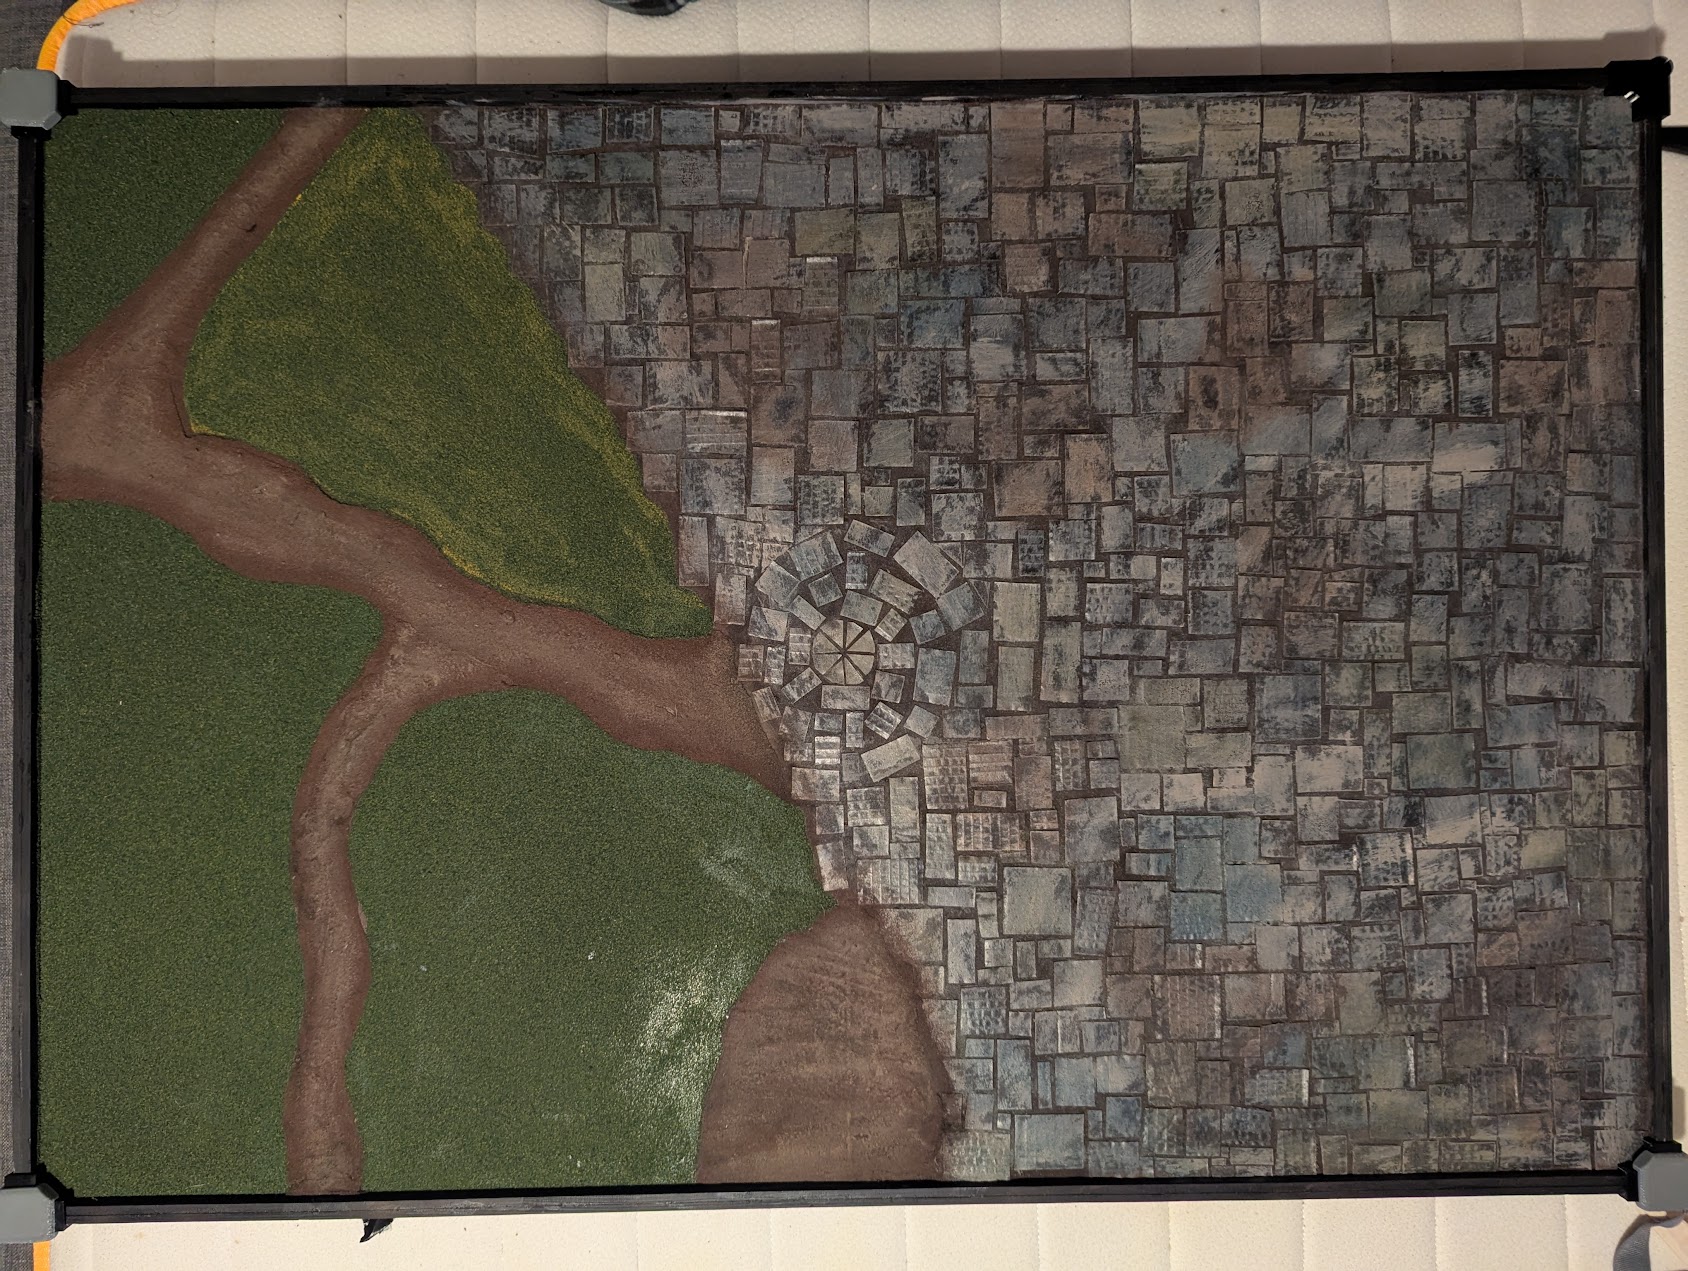
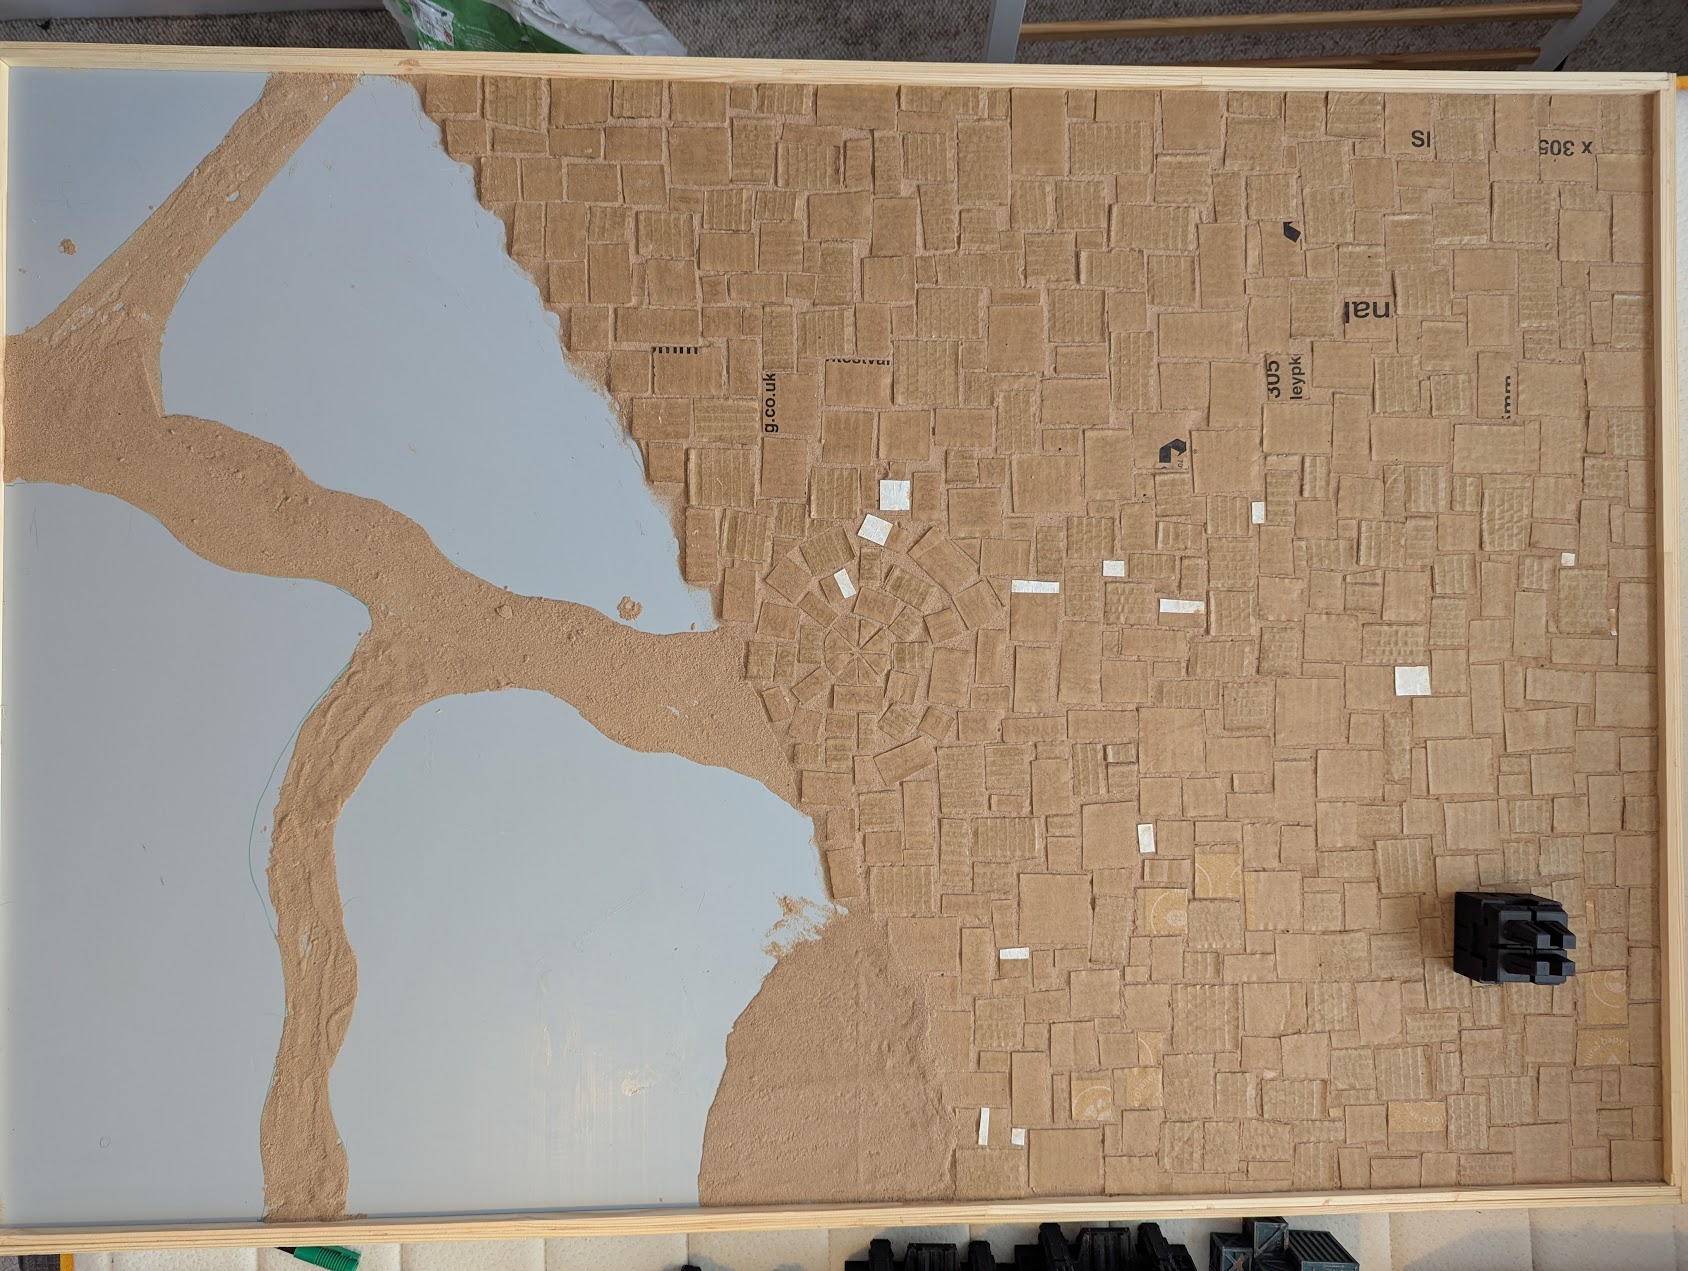
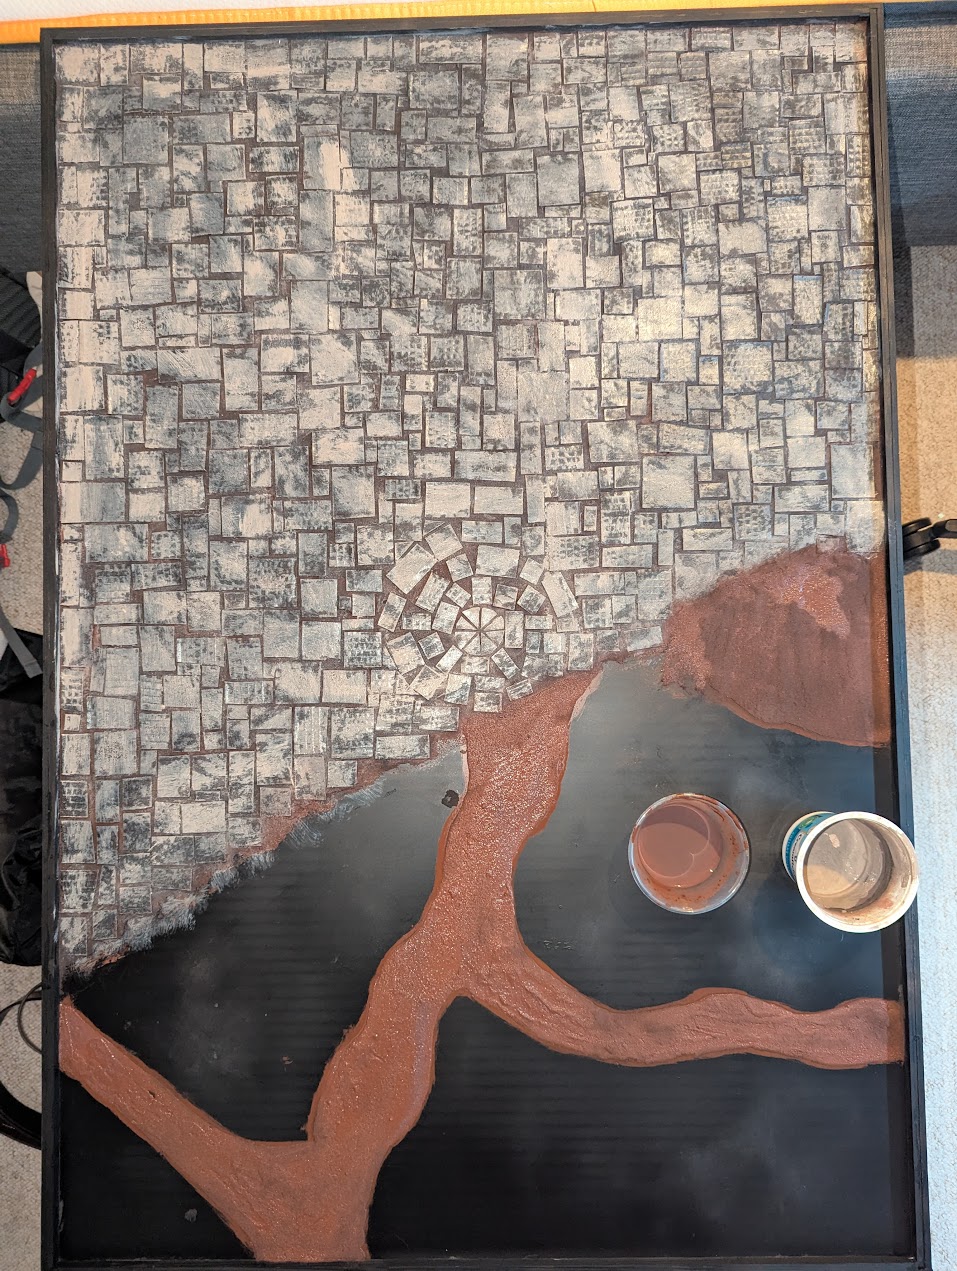
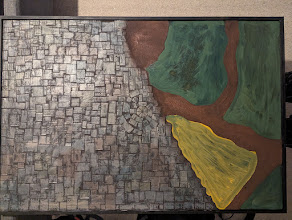
I think I will dedicate a longer post with some better photos (its currently tucked away in a sleeping 2 year olds room!) to the board and the reverse side as well which I’m still working on slowly.
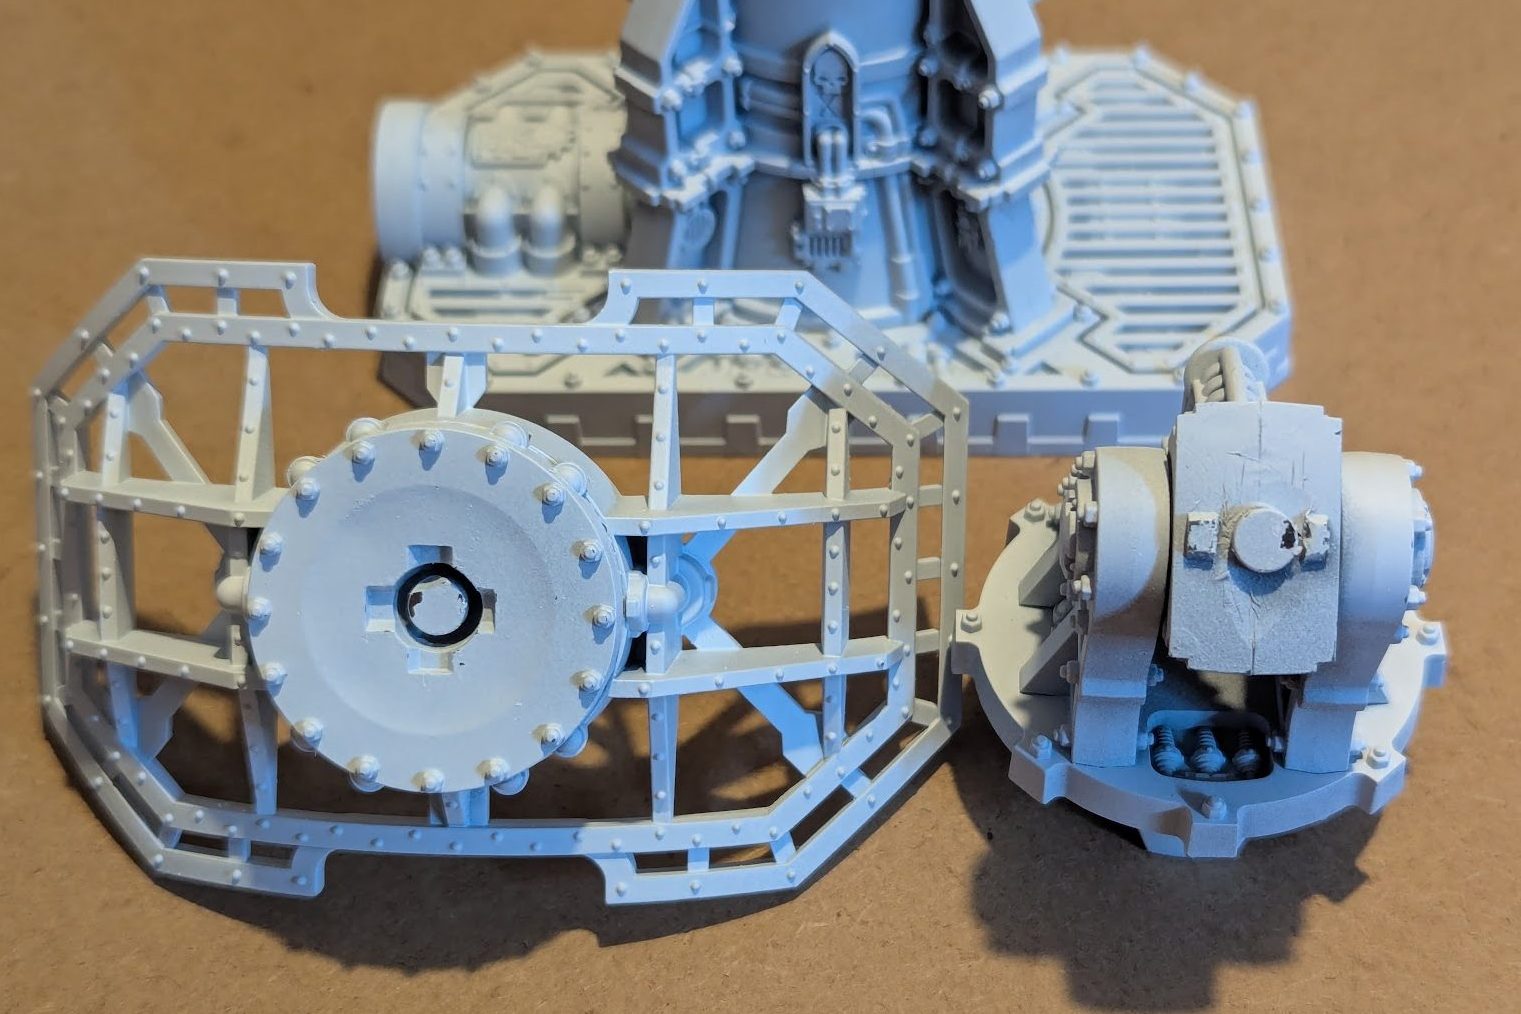
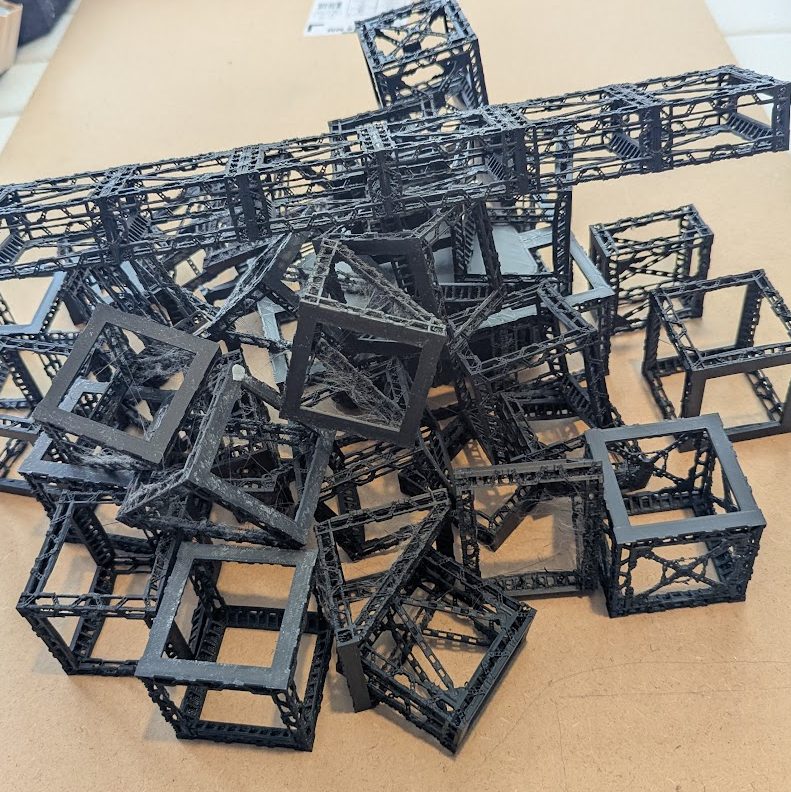
Finally there is the following collection of modules, the plan is for a large centre piece terrain structure that hopefully will only take up minimal actual footprint on table. If I can manage to build it in the planned parts it should also be able act as 3 large individual terrain items as well. But more on that when I finish printing all the parts and start cutting MDF (playing base / backdrop for all these photos), threaded rods, epoxy, steel cable and wingnuts! Guesses to its final form welcomed!
That covers most of the tup content, with some of the remaining parts being smaller scatter which I may cover as a small post of their own and some houses that are in a state of complete unbuilt parts.
As expected this post slipped like a any good planned work to the right and will JUST retain being the second post in the month, next month is likely to be a single post affair as life with a 2 years and weeks old child pairing is proving to be expectedly hectic!

Leave a reply to Fort Syllabub Cancel reply